Small Bathroom Makeover – 90s oak cabinets, grout paint & more
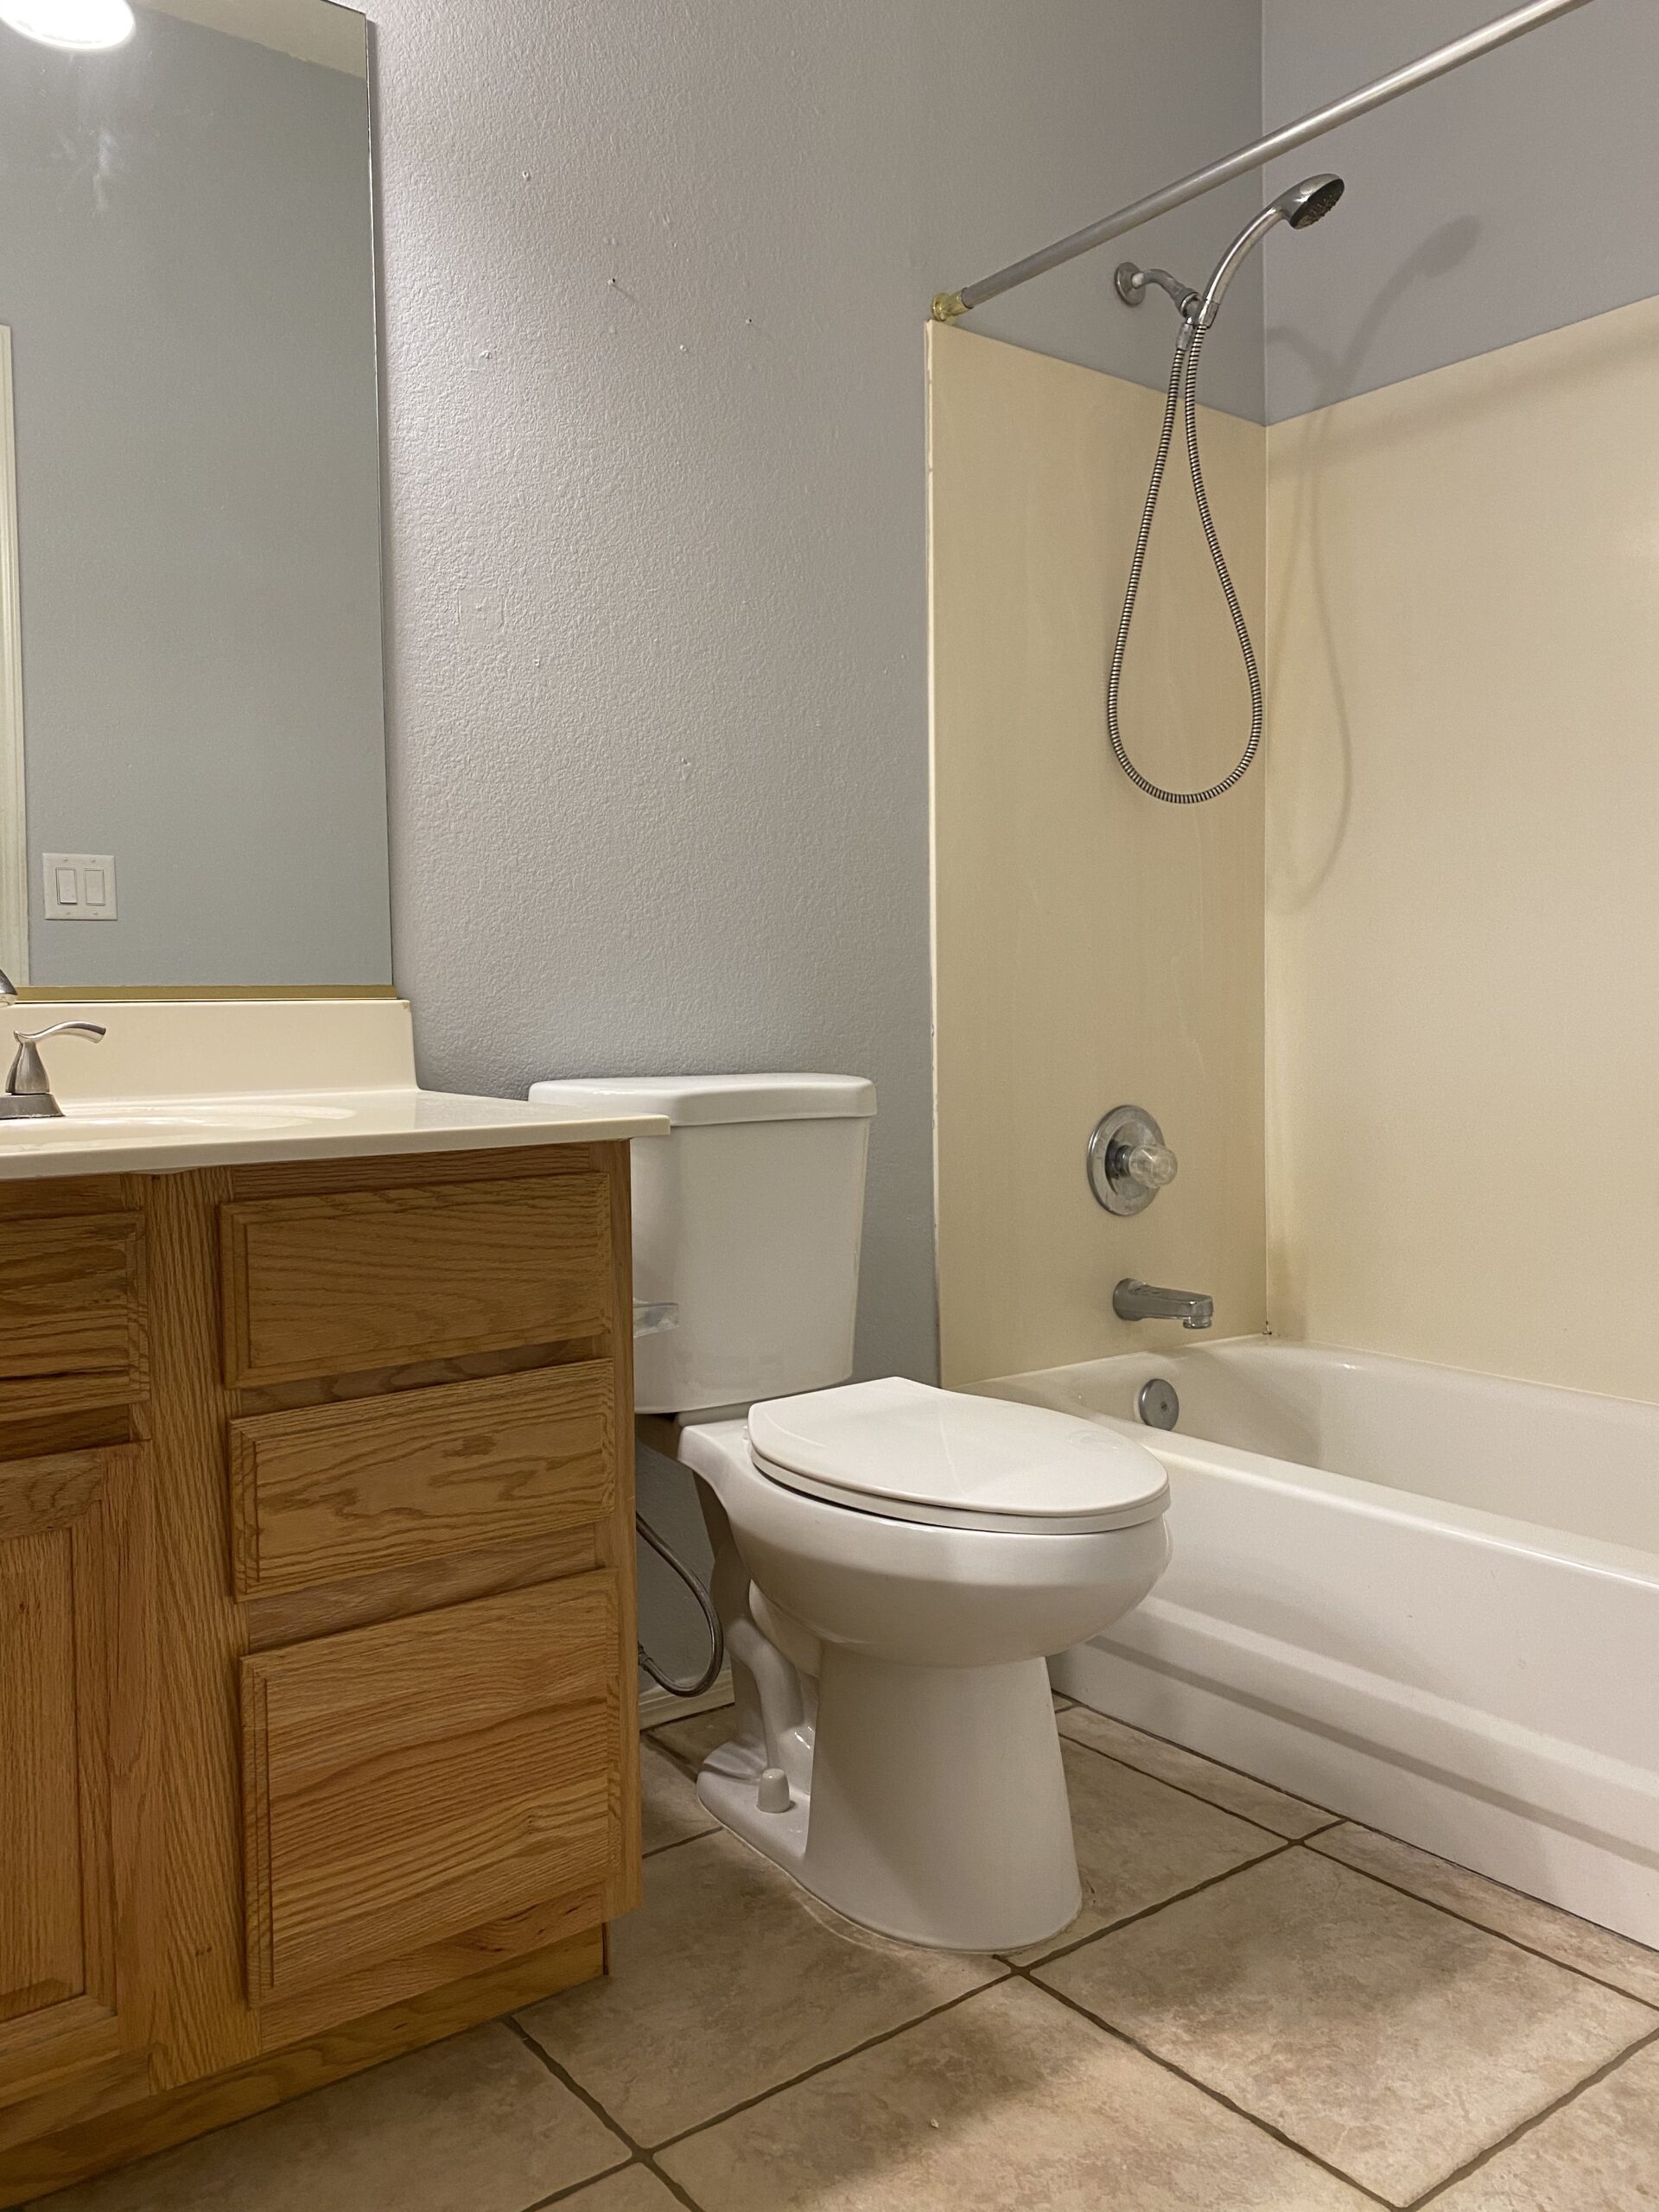
A few years ago, we turned our Small 90s Builder Grade Bathroom into a more modern, moody green and marble bathroom.
We knew this initial small bathroom makeover would be a temporary fix until we could do a an actual remodel. However, I really loved our results! Well, for the most part.
There are plenty of things within this project that I LOVE and feel that you may find valuable. However, there are also a few things that maaaybe I should have done differently. I suppose that’s the beauty of a room makeover!
Today I will be sharing our Small 90s Bathroom remodel in full as well as our plans for this space in the future!
Check out our larger, primary bathroom remodel!
Our Small Bathroom Makeover –

Products used in Small Bathroom Makeover:
- Oak Cabinet Wax in “Tudor Brown”
- Grout Paint & Sealer in “bone”
- Black Arched Mirror
- Gold Faucet
- engineered marble countertop
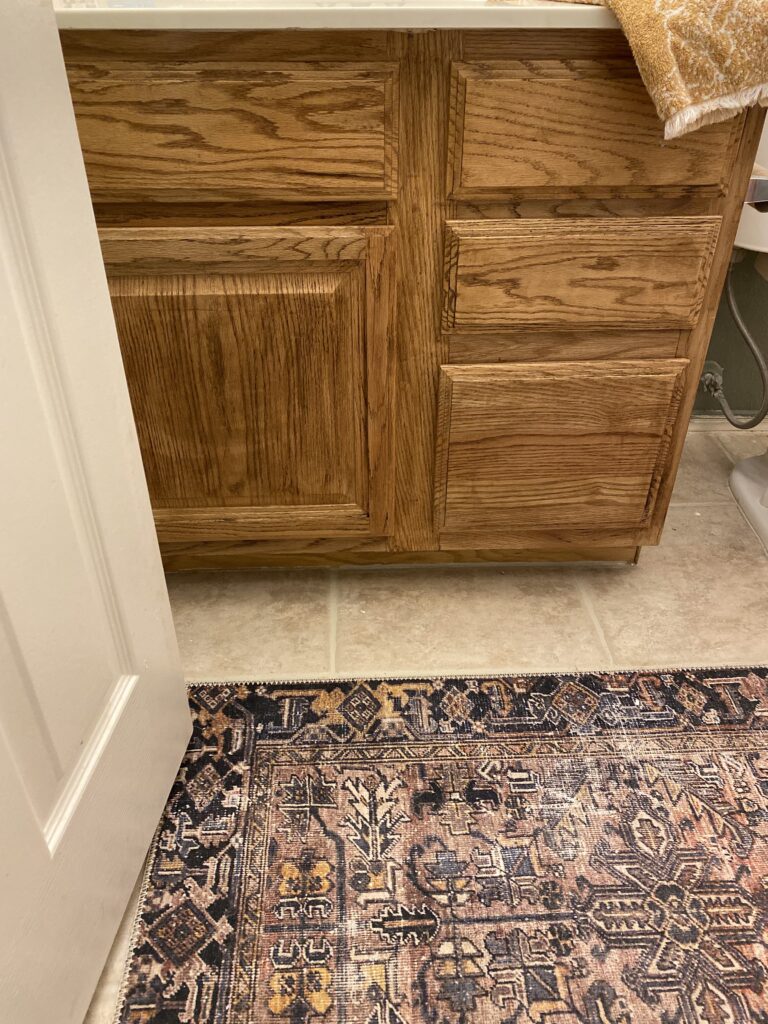
- Rug
- Gold Shower Trim
- Shower Curtain
- Dark Green Paint Color: “Backwoods” by Benjamin Moore
- White Wall Paint Color: “Pure White” by Sherwin Williams
Painting & Sealing the Tile Grout Lines

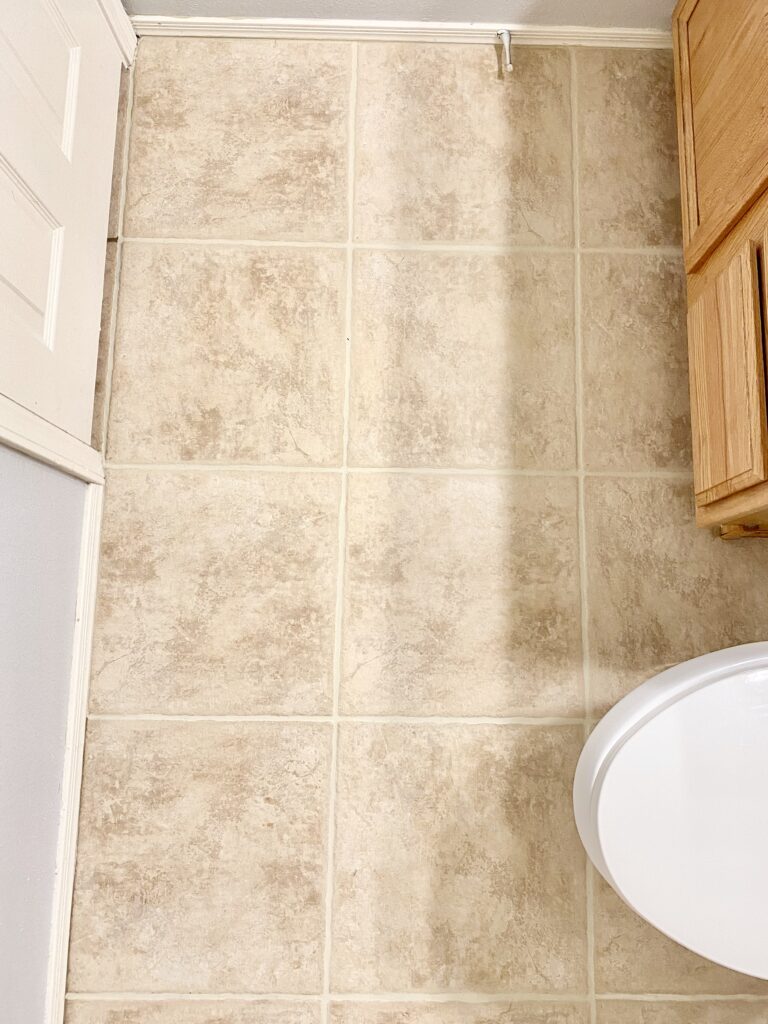
When we were house hunting in 2020, one of my top priorities was to find a house with either LVP or wood/wood-look flooring and minimal tile flooring. It’s mainly a minor grout phobia for me lol… Ironically, we ended up buying a house covered in older tile with the thickest grout lines I’ve ever seen. I love our home though.
We knew our long term goal was to eventually replace the 25+ year old tile flooring, but I needed a quicker solution. For my sanity.
Summer 2020, the world was still in lock down. I had no kids yet and no major responsibilities at the time, so I hand scrubbed, painted and sealed every inch of grout in our home like it was my job.
Just seeing how dirty the grout was prior to painting was worth the labor!
Products Used:
- Grout Cleaner
- Grout Paint & Sealer in the shade “bone”
- Small Craft Paint brushes (similar)
Grout Refresh Steps:
- Deep clean tile & grout. We used this Grout & Tile Cleaner from Amazon.
- Wait 72+ hours after cleaning before painting/sealing
- After 72+ hours, vacuum tile area
- Paint each grout line with one generous coat of Grout Paint & Sealer.
- The grout paint will wipe off most tile, but I still tried my best to stay within the grout lines.
- Let first coat dry for about an hour and apply second coat if needed (only applied a second coat in high traffic areas)
- Light traffic is fine after 2-4 hours.
- Do not get any grout wet for over 72+ hours
Updating our old Oak Cabinets with Briwax
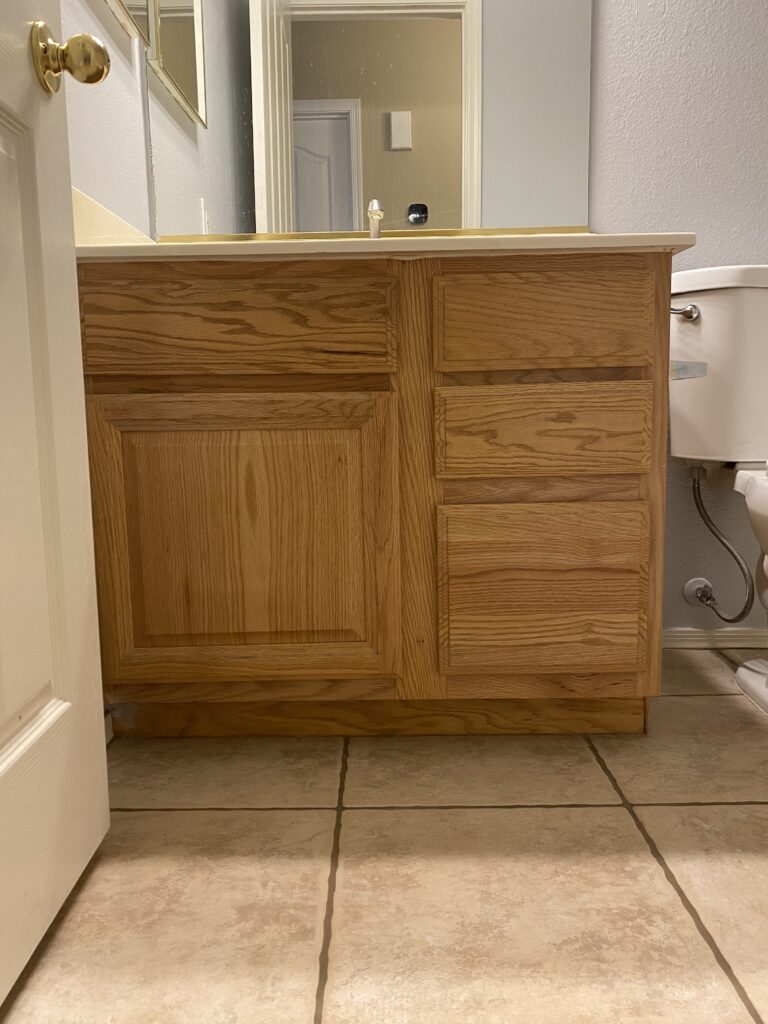
These 90s honey oak cabinets may be old, but they are SOLID and still in pretty good condition. Other than some faded spots (on the main cabinet) and wear and tear on the sides, we really just needed to deep clean the surface and give them a mini makeover.
Painting over oak cabinets has never been something that I’ve ever wanted to attempt. I think it looks lovely for some, but I personally LOVE the look of natural wood grain. Wooden cabinets are warm, timeless (imo), natural and just easier to maintain.
Instead of covering the evidence of there ever being 90s oak cabinets in our home, we chose to embrace the character that wood has to offer and accentuate the wood grain with Briwax!
Briwax is a furniture wax that cleans, stains and polishes. It is literally the easiest product to use!
For now, this may be a temporary solution since we’ve been saving for a complete bathroom remodel. However, this temporary solution could be a permanent fix. It turned out so nice! (other than that initial faded spot on the cabinet that just wouldn’t take color)
Products Used:
- Cabinet cleaner & degreaser
- 220 grit sandpaper
- Briwax in “Tudor Brown”
- Lint Free Rags
- Microfiber cloths
Cabinet Polishing Steps:
- Deep clean cabinet surface using an everyday cleaner/degreaser, let dry for a few hour
- Lightly sand the surface of cabinets and drawers. Enough for the wax product to stick)
- Wipe off sanded residue thoroughly with Microfiber cloths
- Using a Lint Free Rag, apply Briwax into the wood grain and spreading across surface in one smooth direction.
- Apply more Briwax in areas you want to be more pronounced
- Once dry, lightly wipe off excess product with a microfiber cloth
Replacing Bathroom Vanity Countertops
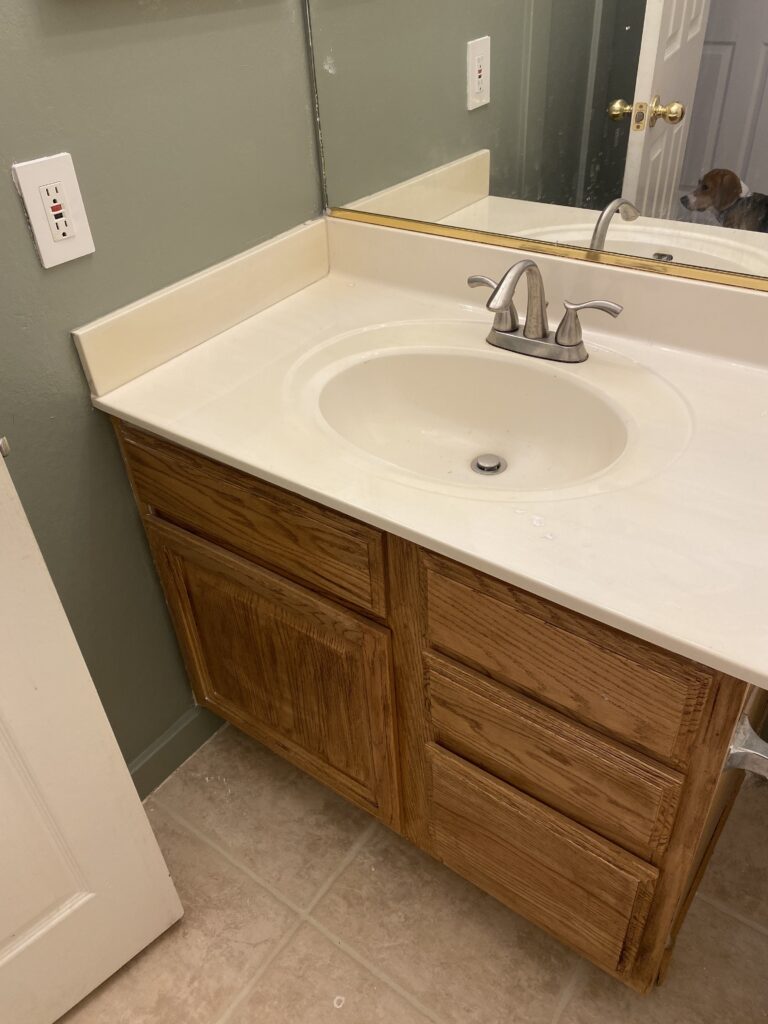
Our old cabinets may be solid and in good condition, but the 25+ year old countertops were a different story. I am pretty sure the original countertops were cultured marble. However, there were yellow stains, water rings and scratches that we could not remove.
In the beginning of this small bathroom makeover process we toyed around with the idea of replacing the vanity all together. However, a quality piece was just not in our budget at the time. Replacing the countertop was much more affordable!
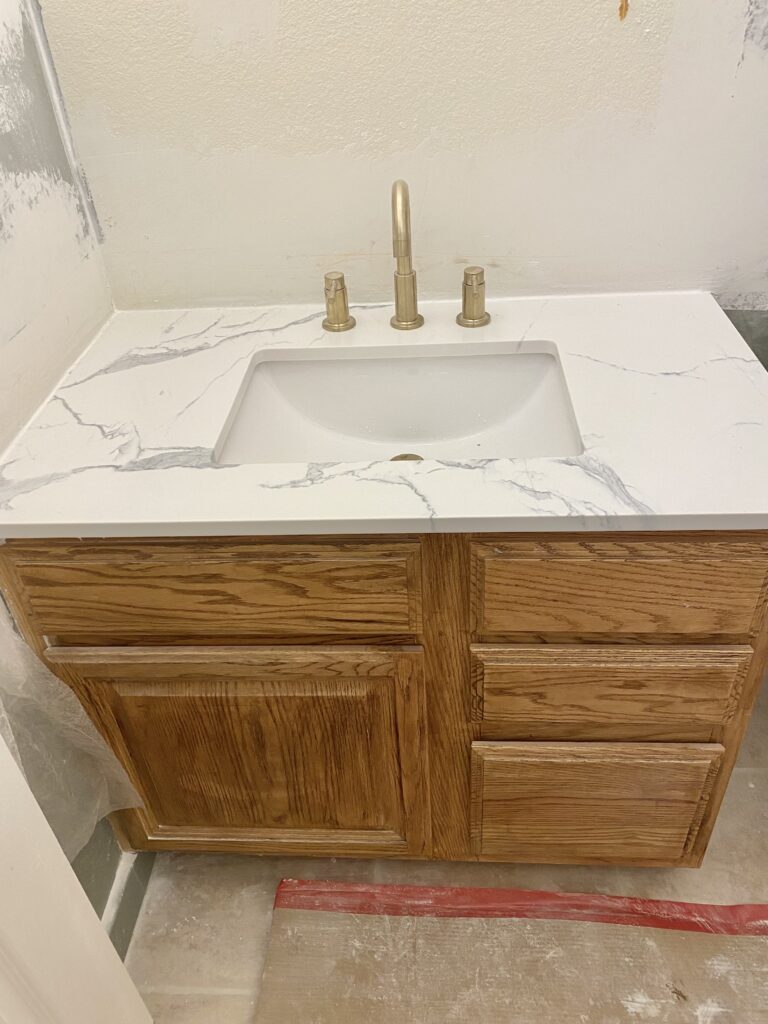
We found this engineered marble replacement countertop on major sale at Home Depot and took it as a sign!
The Rest of our Small Bathroom Makeover

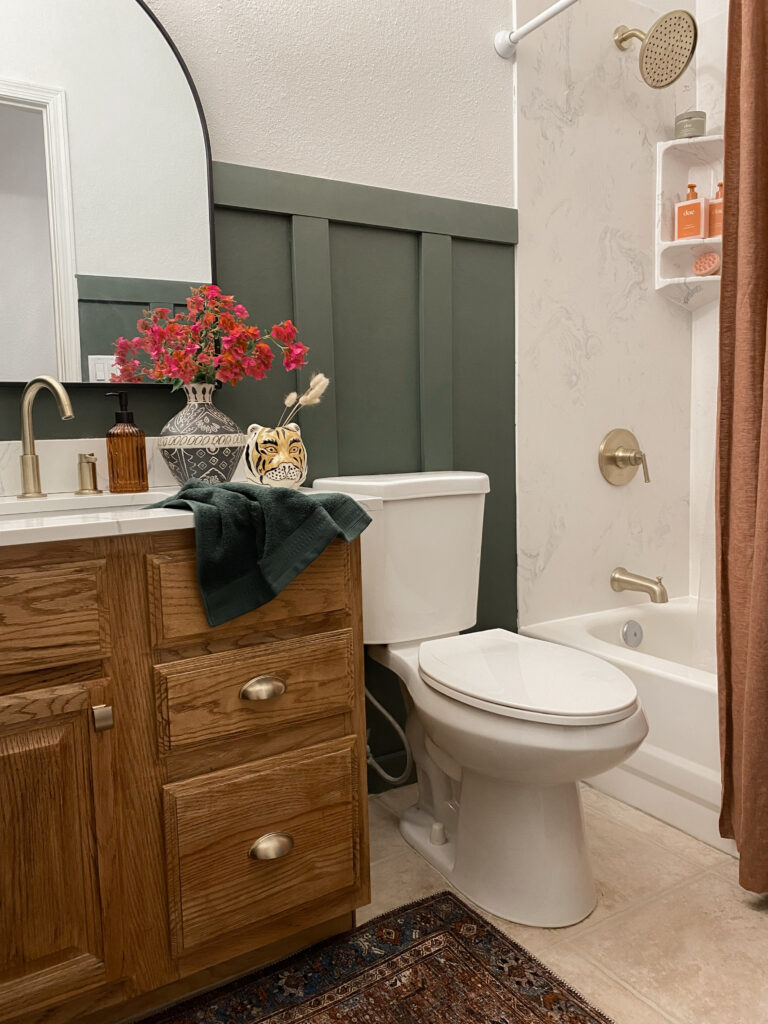
Moody Green Bathroom Wall Color
After painting the powder blue-grey walls “Pure White” by Sherwin Williams, I went on an impulse Lowes run and picked up “Evergreen Fog” also by Sherwin Williams. You can see that muted forest green color a few photos above under “replacing the bathroom countertops”.
A few months later, I decided it just wasn’t the moody green wall color I was going for, so I went on another impulse Lowes run and picked up “Backwoods” by Benjamin Moore (color matched into the Sherwin Williams brand paint).
I debated painting the entire bathroom in “Backwoods” but ultimately settled on the more complicated diy option of creating a board and batten wall.
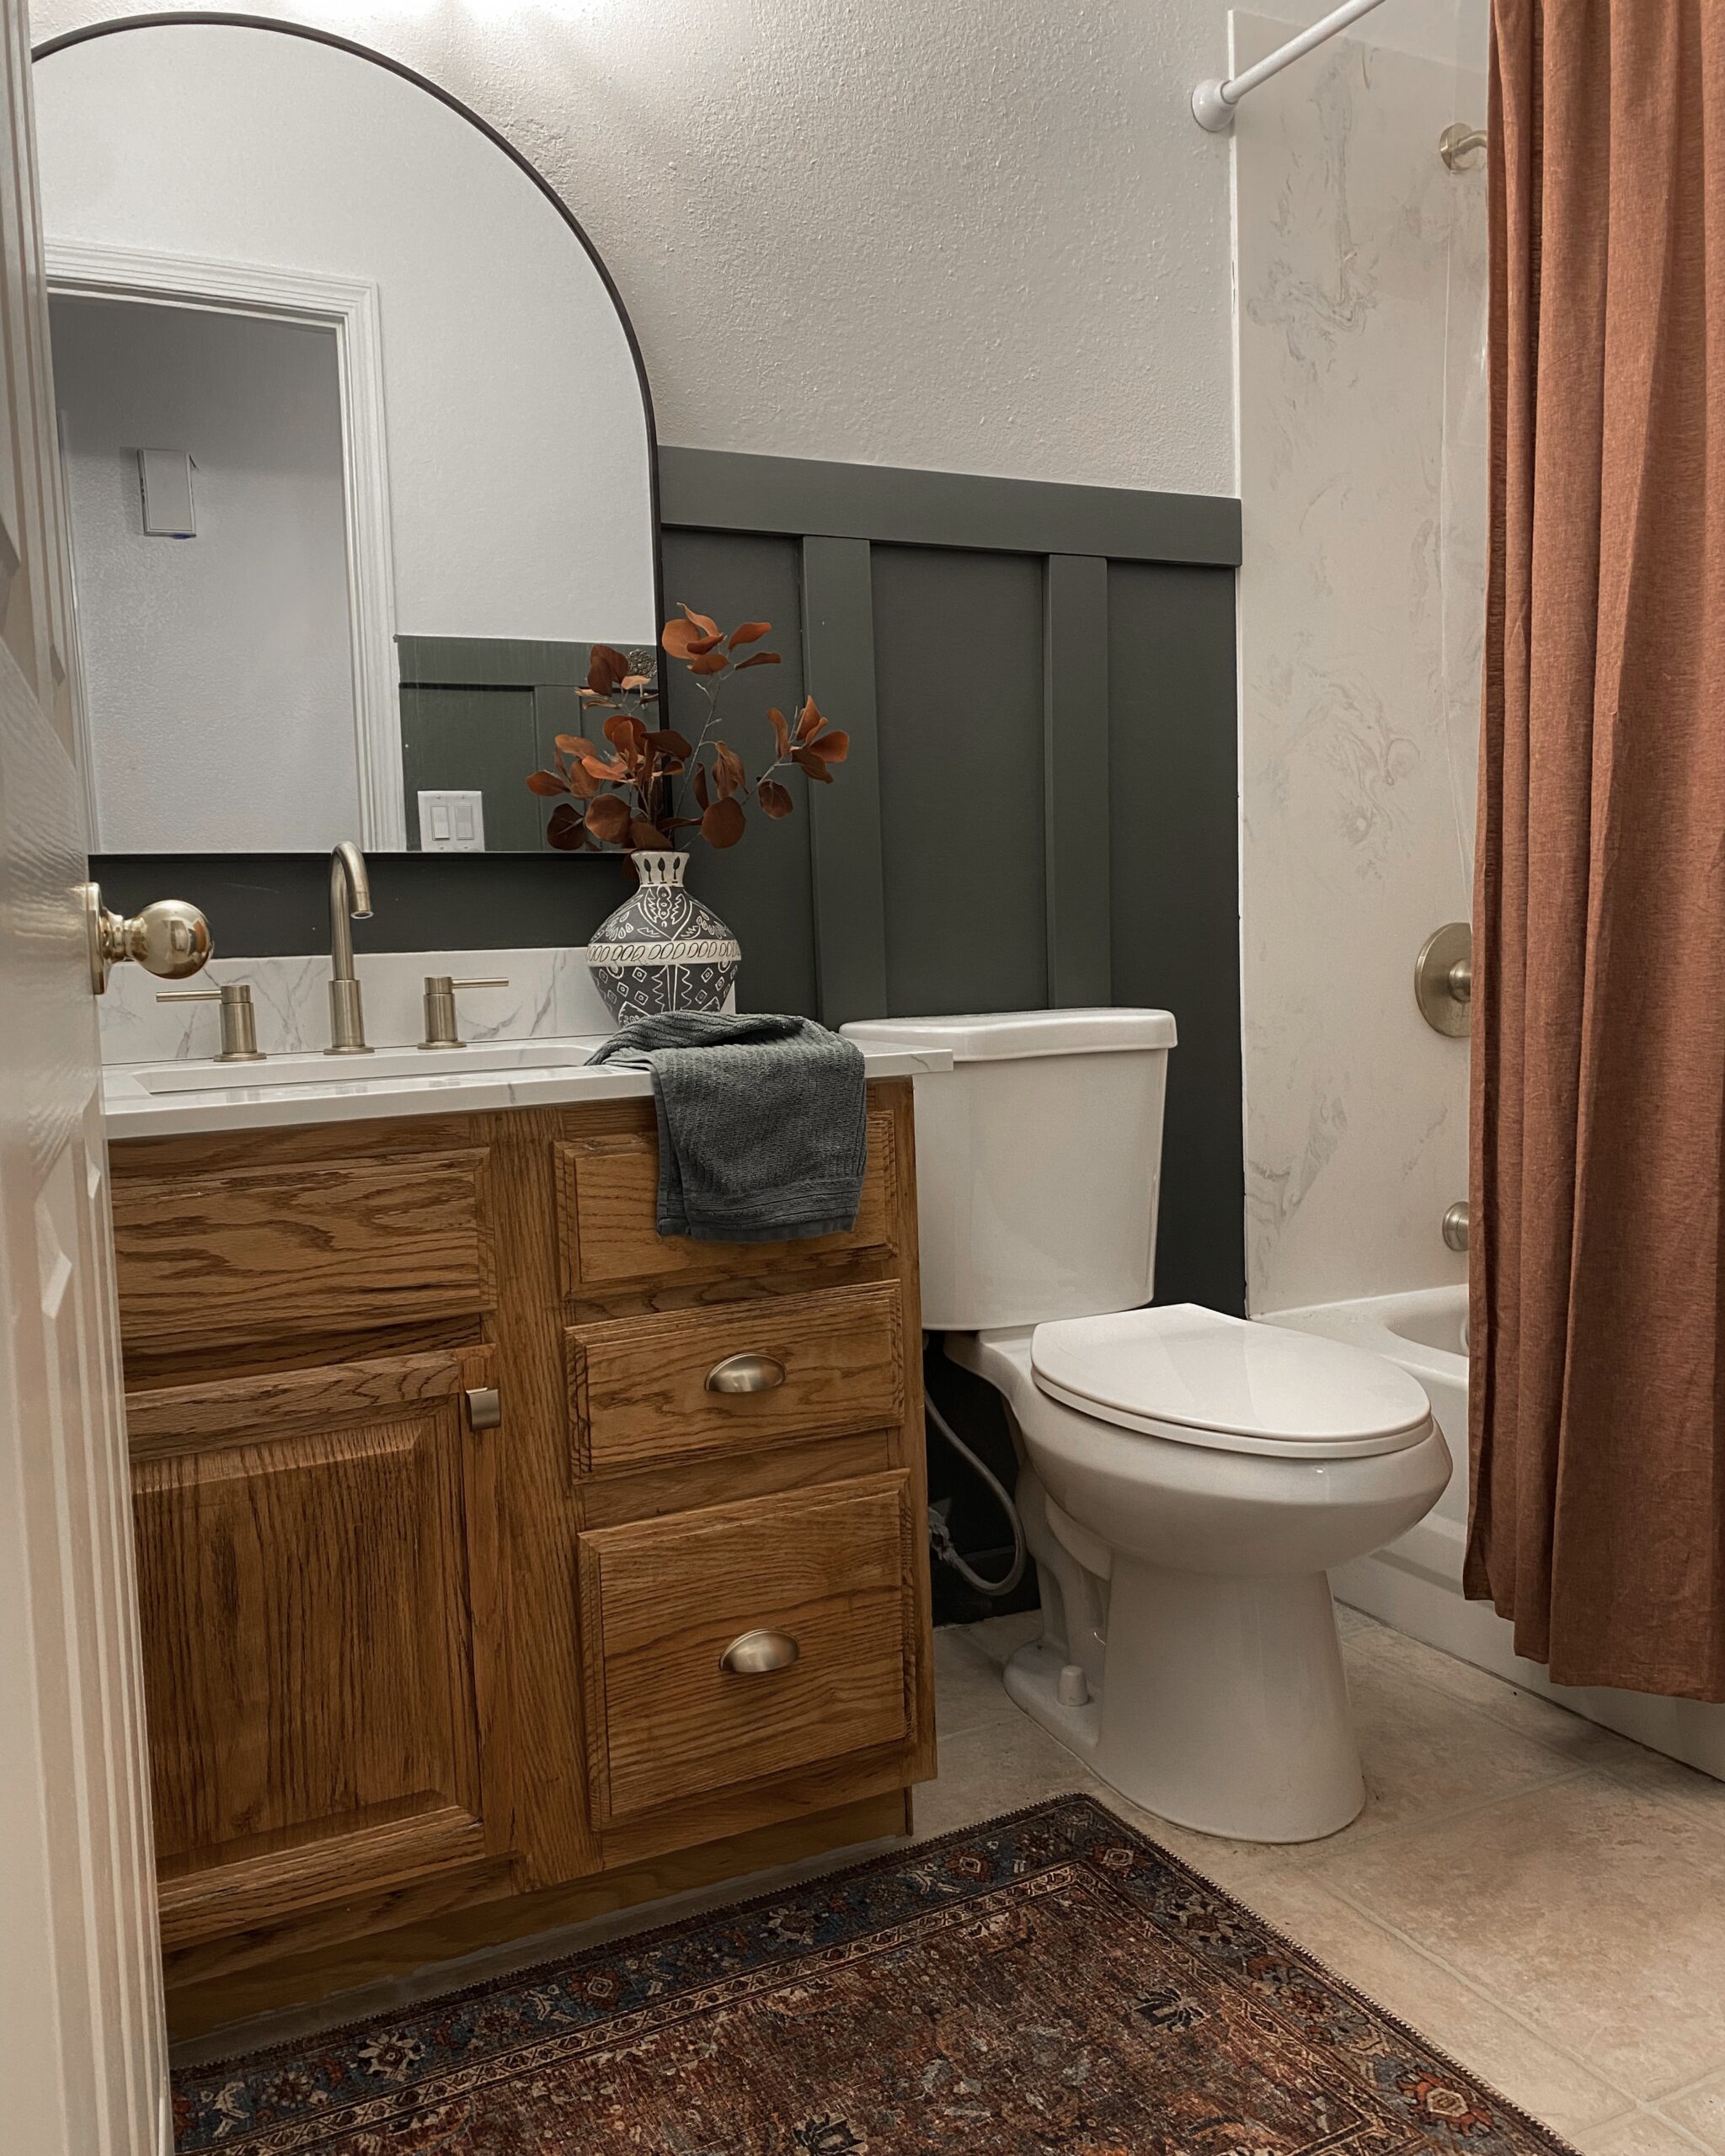
DIY Board & Batten Wall
This is where our bathroom makeover begins to feel a little frustrating.
Honestly, I gave it my all with this DIY Board & Batten wall. I was so excited about it until the finished product. I just don’t love how it turned out.
I don’t know if it is just the thickness of each board, the color, the height I chose, the fact I cannot really hang any shelves or what?
I think if we were to ever redo this, I would use beadboard or thinner boards (if I can find them).
New Marble Look Shower Panels
When we moved in, we knew this bathroom would need a little work. Not only did it need an aesthetic makeover, but the shower itself was not working.
For this part of the project, we hired a plumber and freelance contractor to install the engineered marble shower walls.
This is where the project took another wrong turn for us. I hate these shower panels haha.
When choosing our materials and design, the marble look we originally chose was more of a calacatta marble with large distinctive veins. We were told this calacatta marble veining could be achieved with the engineered marble. Needless to say, my stomach turned a bit when I saw what had been installed.
It really looks as if someone just poured a little grey paint and swirled it around with no actual marble technique in mind… because that is probably what they did. *insert that one tiktok sound “this is what I wanted, the pastels…” you know that sound…*
Does one ask the workers to rip out the new shower panels, add more damage to the walls wait a few more weeks/months for new panels while maintaining the construction zone in their house? Or do you just live with it, because they aren’t that bad?
We decided just to live with it. They really aren’t that bad…
Closing thoughts
This small bathroom makeover was done over three years ago which I feel has given me time to sort through my triumphs and regrets with the project.
I LOVE how affordable, easy and effective the grout paint and cabinet glaze were. I feel both really made the bathroom feel more clean and refreshed.
Additionally, replacing the builder grade flat mirror with this Black Arched Mirror was another bathroom glow up that was needed! Small Bathroom Makeovers don’t have to be expensive and complicated!
My regrets mainly involve our choice of contractors for the bathtub. We were given the ability to choose how we wanted the engineered marble to look, however it did not turn out as we requested. Unfortunately, we didn’t get to approve the material prior to installation which is something we should have seen as a red flag. Hindsight is 20/20 and we definitely learned from this experience!
However, overall I am pretty proud of this mini bathroom makeover!
You May Also Be Interested In: